背景故事
和朋友一起玩饥荒是非常快乐的事情。在和朋友在开新档时总说:“这个是长期档,咱们好好玩”,然而总是“半途而废”。
饥荒弃坑已经很久了,前一阵儿和朋友偶然说玩一玩饥荒,我们离开的时间里klei一直勤奋地更新着,攒了好大一波对我们来说的“新内容”,可以一次体验个够了。而我们又发现了一些有趣的mod,比如《神话书说》、《棱镜》,这下料就更足了。
我用windows在游戏内,开mod,创建存档,断断续续玩了差不多200天(饥荒游戏内的日历)。最近工作上开始忙了,不能稳定地创建服务器,所以想把这个存档迁移到云服务器上,这样就方便多了。
存档迁移
本地准备工作
找到存档
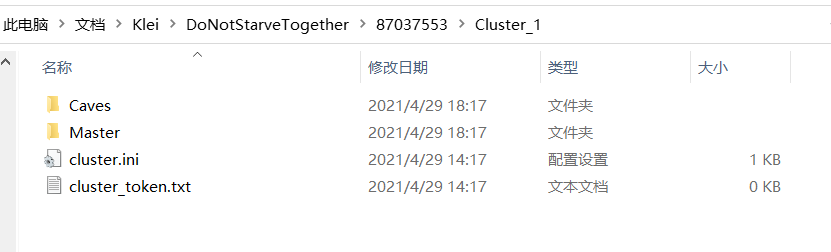
既然是迁移存档,首先要找到存档的位置。
windows的饥荒联机版存档位置一般在这个目录,(87037553这个可能是用来区分不同steam账户的)
1
C:\Users\{用户名}\Documents\Klei\DoNotStarveTogether\87037553\Cluster_1
创建并下载服务端配置
登录klei账号:https://accounts.klei.com/account/game/list
使用steam登录,登录后选择【《饥荒:联机版》的游戏服务器】按钮
(https://accounts.klei.com/account/game/servers?game=DontStarveTogether)
添加新服务器,填写好服务器配置后,点击【下载设置】按钮,得到一个压缩文件MyDediServer.zip。
解压空白存档,将其替换成要迁移的存档
解压MyDediServer.zip后,把我们的存档替换进来:
- 删除 MyDediServer 下的 Master 和 Caves 文件夹;
- 将我们需要迁移的存档 Cluster 目录下的 Master 和 Caves 文件夹拷贝到 MyDediServer目录里。
服务器准备工作
环境安装
登录云服务器,执行
1
yum install -y libstdc++6:i386 libgcc1:i386 libcurl4-gnutls-dev:i386 screen
安装steamcmd
1
2
3
mkdir ~/steamcmd && cd ~/steamcmd
wget "https://steamcdn-a.akamaihd.net/client/installer/steamcmd_linux.tar.gz"
tar -zxvf steamcmd_linux.tar.gz
创建游戏存档目录
1
mkdir -p ~/.klei/DoNotStarveTogether
上传空白存档
把之前得到的MyDediServer.zip,上传到~/.klei/DoNotStarveTogether并解压。
1
2
# 空白存档的位置
~/.klei/DoNotStarveTogether/MyDediServer
开始迁移
启动脚本上传至云服务器
上传或者创建以下脚本到云服务器的当前用户目录(~/): 下载地址:https://accounts.klei.com/assets/gamesetup/linux/run_dedicated_servers.sh
1
2
3
4
5
6
7
8
9
10
11
12
13
14
15
16
17
18
19
20
21
22
23
24
25
26
27
28
29
30
31
32
33
34
35
36
37
38
39
40
41
#!/bin/bash

steamcmd_dir="$HOME/steamcmd"
install_dir="$HOME/dontstarvetogether_dedicated_server"
cluster_name="MyDediServer"
dontstarve_dir="$HOME/.klei/DoNotStarveTogether"

function fail()
{
	echo Error: "$@" >&2
	exit 1
}

function check_for_file()
{
	if [ ! -e "$1" ]; then
		fail "Missing file: $1"
	fi
}

cd "$steamcmd_dir" || fail "Missing $steamcmd_dir directory!"

check_for_file "steamcmd.sh"
check_for_file "$dontstarve_dir/$cluster_name/cluster.ini"
check_for_file "$dontstarve_dir/$cluster_name/cluster_token.txt"
check_for_file "$dontstarve_dir/$cluster_name/Master/server.ini"
check_for_file "$dontstarve_dir/$cluster_name/Caves/server.ini"

./steamcmd.sh +force_install_dir "$install_dir" +login anonymous +app_update 343050 validate +quit

check_for_file "$install_dir/bin"

cd "$install_dir/bin" || fail

run_shared=(./dontstarve_dedicated_server_nullrenderer)
run_shared+=(-console)
run_shared+=(-cluster "$cluster_name")
run_shared+=(-monitor_parent_process $$)

"${run_shared[@]}" -shard Caves  | sed 's/^/Caves:  /' &
"${run_shared[@]}" -shard Master | sed 's/^/Master: /'
赋予脚本可执行权限
1
chmod u+x run_dedicated_servers.sh
执行脚本启动服务
1
2
3
screen
./run_dedicated_servers.sh
执行成功后,服务器上会生成一些目录,Ctrl+c停止脚本,进行后续操作。
- 生成的
~/dontstarvetogether_dedicated_serve可以存放稍后上传mod - 生成的
~/.klei/DoNotStarveTogether用来存放存档
上传需要迁移的游戏存档
将准备好的 MyDediServer 文件夹,上传到~/.klei/DoNotStarveTogether下。
1
2
# 存档上传后的路径:
~/.klei/DoNotStarveTogether/MyDediServer
上传游戏mod
windows本地饥荒游戏mod一般在
1
2
3
{steam安装目录}\Steam\steamapps\common\Don't Starve Together\mods
# 比如
D:\Program Files (x86)\Steam\steamapps\common\Don't Starve Together\mods
将这个mods文件夹里的文件上传到服务器下面的目录中
1
~/dontstarvetogether_dedicated_server/mods
对于《神话书说》《棱镜》等mod,并没有在上面的mods目录中,需要在这个目录下找
1
2
3
{steam安装目录}\Steam\steamapps\workshop\content\322330
# 比如
D:\Program Files (x86)\Steam\steamapps\workshop\content\322330
找到对应的mod,并上传到服务器~/dontstarvetogether_dedicated_server/mods中。
注意,需要将这些mod的文件夹命名为workshop-{mod ID}的格式。
比如workshop-727774324。
Myth Words Theme-神话书说主题:workshop-1991746508
Myth Words Characters 神话书说角色:workshop-1699194522
[DST] Legion-棱镜:workshop-1392778117
mod更新
在~/dontstarvetogether_dedicated_server/mods/dedicated_server_mods_setup.lua
文件末尾添加 ServerModSetup('mod编号')
1
2
3
4
5
6
7
8
9
10
11
12
13
--There are two functions that will install mods, ServerModSetup and ServerModCollectionSetup. Put the calls to the functions in this file and they will be executed on boot.

--ServerModSetup takes a string of a specific mod's Workshop id. It will download and install the mod to your mod directory on boot.
	--The Workshop id can be found at the end of the url to the mod's Workshop page.
	--Example: http://steamcommunity.com/sharedfiles/filedetails/?id=350811795
	--ServerModSetup("350811795")

--ServerModCollectionSetup takes a string of a specific mod's Workshop id. It will download all the mods in the collection and install them to the mod directory on boot.
	--The Workshop id can be found at the end of the url to the collection's Workshop page.
	--Example: http://steamcommunity.com/sharedfiles/filedetails/?id=379114180
	--ServerModCollectionSetup("379114180")
ServerModSetup("1392778117")
ServerModSetup("378160973")
注释掉run_dedicated_servers.sh 脚本中的这一行后,重新运行脚本启动服务
1
2
# ./steamcmd.sh +force_install_dir "$install_dir" +login anonymous +app_update 343050 validate +quit
其他注意
报libcurl-gnutls.so.4找不到的错误
1
./dontstarve_dedicated_server_nullrenderer: error while loading shared libraries: libcurl-gnutls.so.4: cannot open shared object file: No such file or directory]
解决办法:
1
2
3
# 给steamcmd创建软连接
ln -s /usr/lib64/libcurl.so.4 ~/steamcmd/linux32/libcurl-gnutls.so.4
ln -s /usr/lib64/libcurl.so.4 ~/steamcmd/linux64/libcurl-gnutls.so.4
1
2
3
# 注意查看 /usr/lib64 下是否存在 libcurl.so.4
# 如果不存在,查看有没有 libcurl.so.4.XX,有的话创建一个软连接
ln -s /usr/lib64/libcurl.so.4 /usr/lib64/libcurl.so.4.3.0
如果还是不行,安装
1
2
3
4
yum install libcurl.i686
cd /usr/lib
ln -s libcurl.so.4 libcurl-gnutls.so.4
报ld-linux.so.2找不到的错误
安装ld-linux.so.2:
1
yum install ld-linux.so.2
报错ERROR: ld.so: object '/$LIB/libonion.so' from /etc/ld.so.preload cannot be preloaded: ignored.
清空 /etc/ld.so.preload
1
echo "" > /etc/ld.so.preload